Cleaning your guitar strings is probably one of the easiest tasks for the guitarist to perform. Strings that are clean and grime free will perform much better and last longer than those that are dirty, even for players that change them frequently.
Of course, it’s a good idea to wipe down the strings with a dry rag every time you play the guitar to remove the oil that accumulates the strings from your fingertips, but giving them a good cleaning every two to four hours of playing time will ensure that they remain in top condition.
It should go without saying that if any of the strings on your guitar are rusted, kinked or otherwise damaged, they should be replaced. There are few things more annoying than having to stop mid-song to replace a broken string.
Things You Will Need
While there are countless specialty products on the markets from cleaners to polishing compounds and the like, it is not necessary, or particularly useful, to invest in those as a thorough cleaning can be performed with a minimum of tools, and with practice, can be completed in about 20 minutes. You will not need any specialty tools; you can find the required items in any hardware or general merchandise store.
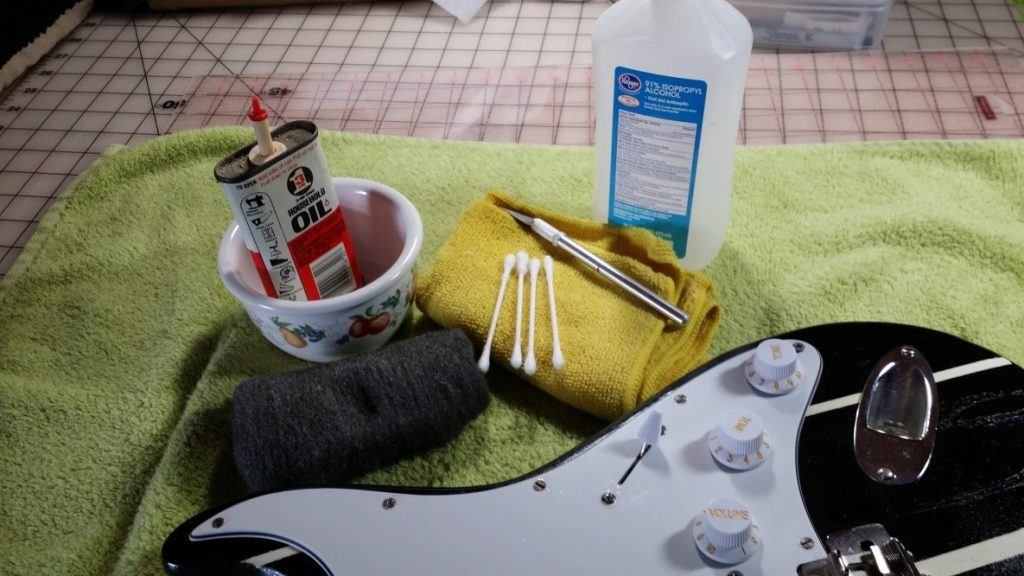
- A clean lint-free cloth
- Isopropyl alcohol
- A small bowl
- Q-tips
- Fine steel wool
- 3-in-1 oil
- X-Acto (crafting) knife
Step 1: Preparing Your Guitar
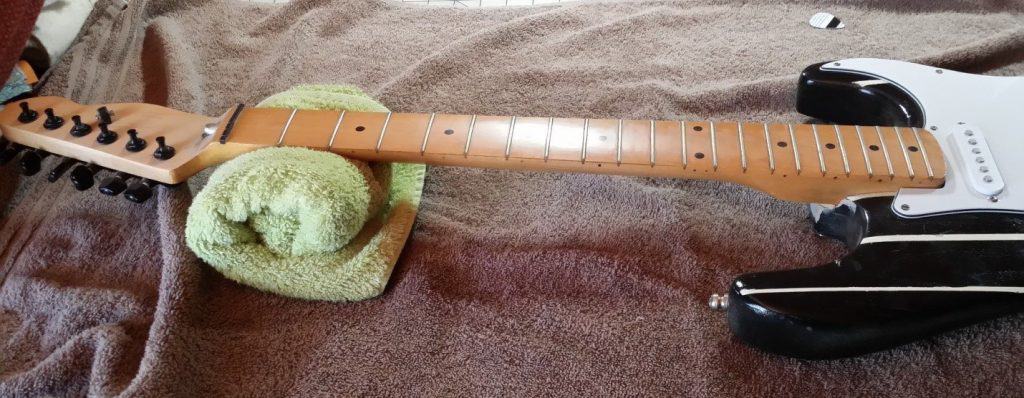
It’s important to have a steady surface to work on that supports the neck of the instrument while you work on it. Placing a towel on a desk or table with another towel that can be rolled up and placed under the back of the neck near the headstock to support it should be sufficient. Place the guitar on the towel, string side up.
If you have a locking nut, remove the string clamps. Loosen the strings, and remove each string from the tuning machine. It is not necessary to completely remove the strings from the guitar at the tailpiece. Pour some of the alcohol into a small bowl.
Step 2: Inspecting For Damage
Having the strings removed provides an excellent opportunity to examine the guitar for any damage that may occur during the usual course of play. Early detection and repair of potential problems can save you the cost of a big repair bill further down the line.
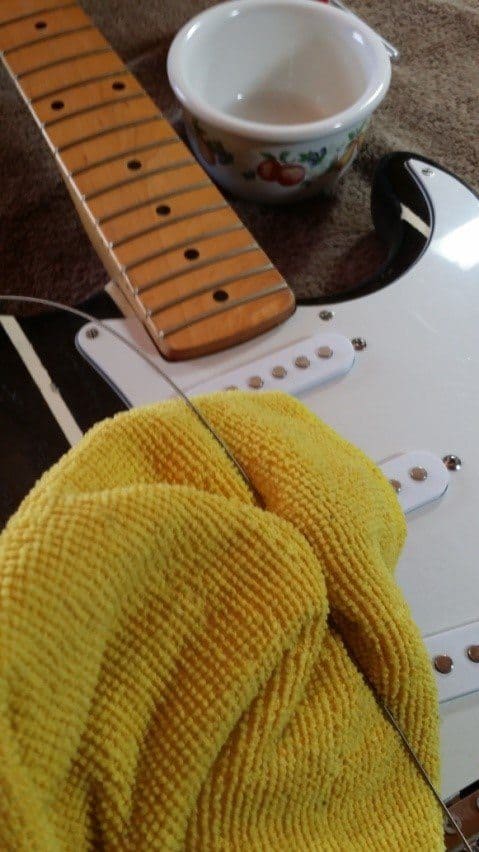
Using the lint-free cloth, wipe down the fingerboard and nut. If there are any areas where the grime has gotten stuck on, you can use a Q-tip dampened with a bit of alcohol to loosen it so it can be wiped away.
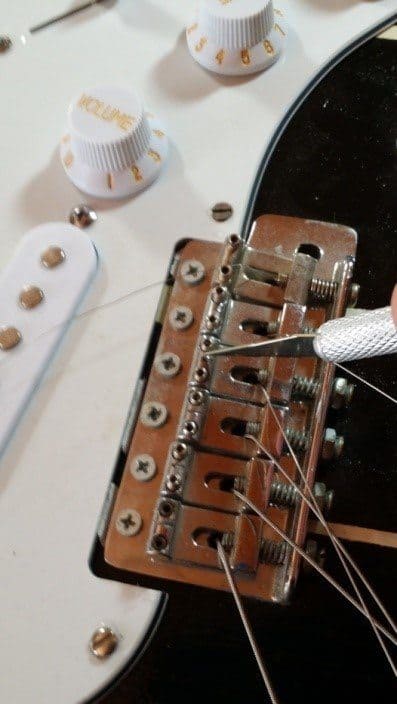
Also, use this opportunity to inspect the nut and bridge saddles for any signs of wear. The best way to keep little problems from becoming big ones is to catch them early. Repairs to nuts, especially locking nuts, and bridge saddles are best left to qualified repair personnel.
Also, wipe down the guitar body where the strings pass over to remove any residue there. If there in any trace of dirt, grime or other residue in the nut slots, use the X-Acto knife to gently scrape or pry it out. Be very careful not to damage the nut in the process. Do the same for the bridge saddles.
Step 3: Cleaning The Strings
Cleaning the strings with alcohol will loosen and remove most oil and grime that has accumulated on the strings and does a more complete job than just wiping the strings.
To clean the individual strings, place one corner of the cloth in the alcohol, then squeeze out any excess. It should be damp to the touch, but not soaking wet.
Holding the corner of the cloth between your thumb and forefinger grasp the base of the string near the bridge and, using firm pressure, draw the cloth up the entire length of the string in to clean off any oil, dirt or grime.
Once you have cleaned the entire string, be sure to examine it closely ensure you haven’t missed anything. If there are any spots that remain dirty you can go back and scrub those areas a little more firmly to dislodge any remaining residue. Repeat the process for each individual string.
Step 4: Buffing The Strings
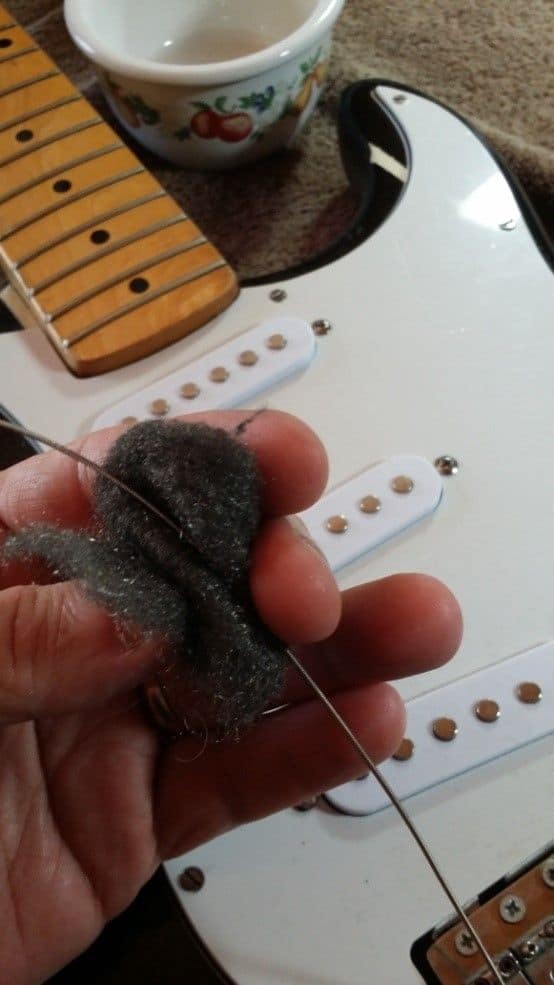
When all strings have been thoroughly cleaned, they need to be buffed with fine steel wool to remove any fine burrs, kinks or grooves on the surface of the strings.
There is some controversy over the need to buff your strings. You will find some people who say it is unnecessary or even damaging to the strings, but if you use the proper technique and a light touch, it is perfectly fine. I’ve used this technique for about 9 years, and it will not decrease the life of your strings.
Grasp the steel wool between your thumb and forefinger and, again, starting at the base of each string, draw the steel wool up the length of each string. Be careful not to apply too much pressure with the wound strings as we are just trying to remove any extraneous material on the string and not trying to alter the surface of the string itself. Using the same pressure as you would use to grasp a sheet of paper will be plenty.
Repeat the process with each individual string. When you have completed the process, examine each string to ensure that it is clean and burr free.
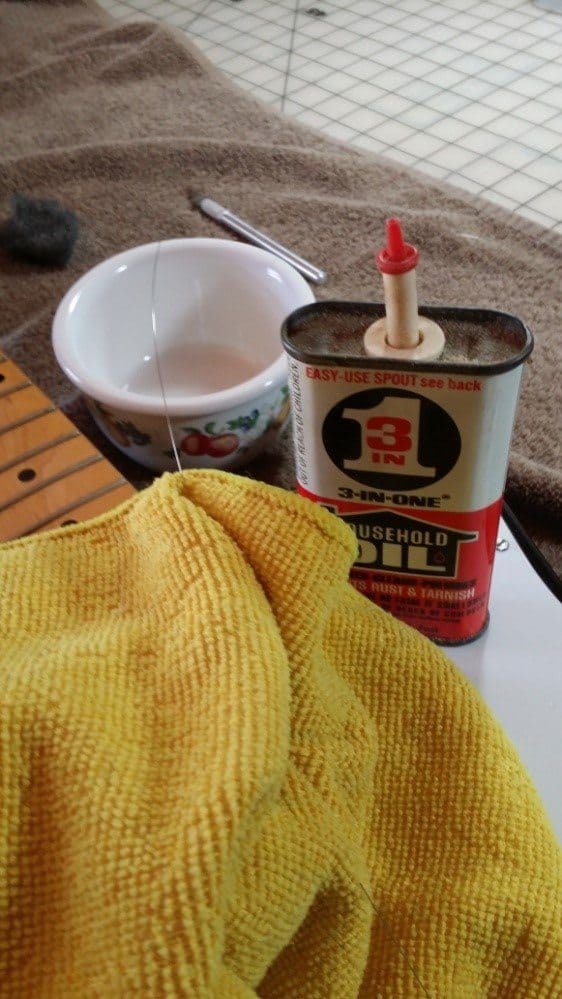
Step 5: Oiling The Strings
At this point, you may ask why are we are oiling the strings if the whole purpose of this exercise was to remove oil and other dirt in the first place?
The oil and sweat that our bodies produce gets deposited on the strings by our fingertips when we play, and is actually destructive to the metal alloys used to make the strings. Over time this will cause rust and a breakdown of the metals.
Using a non-destructive oil, such as 3-in-1 household oil, will actually serve to repel those oils produced by our bodies and preserve the life of the string.
Squeeze a few drops of oil onto a dry corner of the cloth to slightly dampen it. Grasp the cloth between the thumb and forefinger, and starting near the base of the string, grasp it and draw the cloth up the length of the string. Repeat the process for each string.
When you are done, the strings should not be soaked with oil, but there should be a light sheen of oil that’s barely detectable on each string.
Step 6: Reassembling The Guitar
After oiling all strings, it’s time to restring the guitar. Thread each string through the hole in the tuning machine capstan and bring the string taut. Repeat the process for each string.
When the instrument has been restrung, tune the guitar as usual. It’s a good idea to play some tunes and practice a few scales just to ensure that everything sounds as it should and that the strings feel right when you play.
You can initially expect the guitar to fall out of tune from time-to-time as the strings regain their tension. The more you play after restringing the guitar, the quicker the strings will return to their ideal tension.
Finishing Up
Cleaning your strings on a regular basis will undoubtedly increase the responsiveness of your strings, and likely increase your enjoyment in playing as well. I hope you enjoyed this tutorial on cleaning your guitar strings and invite you to share it with your fellow musicians. I also invite you to add your own tips and comments below. Until next time, play on!